Solace has a window where emulated features of the Sol computer plus some emulation options can be inspected and changed. This window can be opened via the "Options" main menu item, or by clicking on the "PROP" button on the toolbar. The options window is closed by either selecting the "X" in the upper right corner of the options window, or by clicking on the "PROP" button on the toolbar.
Most of the options that are controllable via the options window, plus a few other items, can be saved in the file "solace.ini," which is maintained in the directory where Solace is launched from. To save the current options, select "Options/Save Options" from the main menu. When Solace first starts up, it will look for a file "solace.ini" in the starting directory and if it is found, will use the contents of the file to initialize the configurable options.
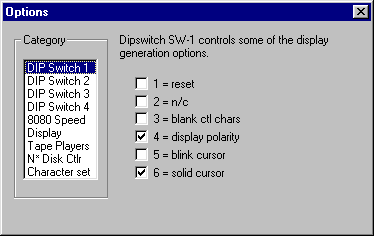
This panel controls the settings for DIP switch 1, which is a switch on an actual Sol. The dipswitch controls some of the video generation options of the Sol.

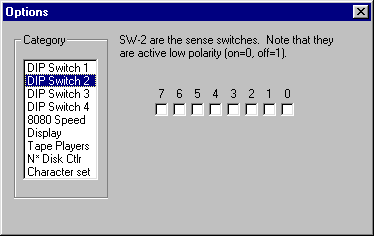
This panel controls the settings for DIP switch 2, which is a switch on an actual Sol. The value of this dipswitch can be read from software by performing an "IN 0FFh" instruction. Very little native Sol software used this feature as the dipswitch is difficult to access.
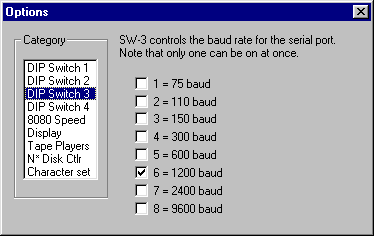
This panel controls the settings for DIP switch 3, which is a switch on an actual Sol. The dipswitch controls The baud rate of the serial port. Although a hardware mod to the motherboard allowed toggle 8 to correspond to 4800 baud, Solace doesn't support it.
Note that only one dipswitch can be selected at a time; this is because the baud rate generator was just a binary counter and the various pins of the divider chip were multiplexed via the dipswitch directly. Enabling two toggles at the same time resulted in two of the outputs of the chip being shorted together.
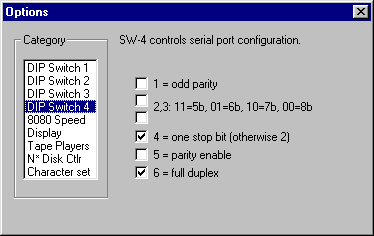
This panel controls the settings for DIP switch 4, which is a switch on an actual Sol. The dipswitch controls some of the serial port configuration options of the Sol.
The various toggles are pretty self-explanatory:
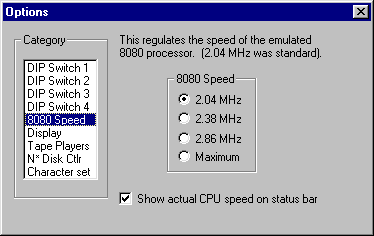
This panel controls what speed the emulated 8080 CPU runs at. Most (all?) Sol computers shipped running at 2.04 MHz. Via a motherboard jumper change, the CPU frequency could be changed to 2.38 MHz or 2.86 Mhz; doing so required installing an 8080 CPU with faster ratings. The final speed option is for Solace to ignore any target frequency and just run as fast as it can.
Independently of what speed is selected, the "Show actual CPU speed on status bar" checkbox, when selected, causes Solace to display what speed the emulated 8080 is running at and what percentage of the x86 CPU is used to achieve that speed. This second figure isn't what you will see if you use an external CPU meter program. To such programs, Solace will appear to be using 100% of the CPU cycles. This is because during idle times where Solace is killing time, it will repeatedly call Windows and relinquish control, only to have it returned immediately. Solace never "sleep()s".
Solace regulates speed in the following manner. Solace performs its emulation in "time slices." At the beginning of a slice, the real time is noted. A fixed number of 8080 cycles are emulated as fast as possible. When all these cycles are done, Solace waits until the real elapsed time has matched how long an 8080 running at the selected frequency should have taken. This jerky procession of emulation and waiting happens rapidly enough that the user isn't aware of it.
Solace will attempt to maintain the selected speed, but certain things can interfere with that process. All 8080 instructions can be emulated far faster than a real 8080 CPU can perform them. However, certain memory addresses have side effects that can take a long time to process. For instance, when a program does an "OUT" instruction to the scrollbase register, the video display generator will instantly start producing video with the new relative scroll offset. To the real 8080 CPU in a Sol, this happens at the full speed. When Solace emulates such an operation, it requires the emulator to perform millions of instructions to regenerate all the pixels on the display before the next instruction can be emulated. The occasional scrollbase register change can be absorbed, but if this register gets twiddled frequently, Solace won't be able to keep up.
Also, if the user performs some GUI interaction, such as selecting a menu item from the main menu, the emulation stops; this is an artifact of the Windows event loop and the fact that Solace isn't a threaded program. Once the GUI interaction stops, emulation will pick up again.
Finally, different x86 family members can support different features. Solace relies on a high precision real-time counter (~1 us granularity) for regulating speed. When Solace starts, if this CPU doesn't support this feature, Solace attempts to use a different API that has a ~1 ms granularity. If this isn't available, Solace drops into unregulated speed mode. The latter two modes aren't very well tested.
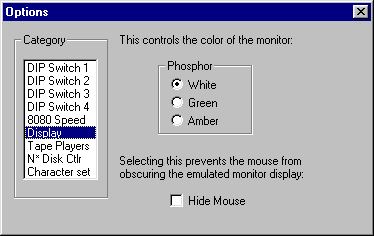
This panel controls how the emulated monitor that the emulated Sol is connected to should appear.
The Sol produced only B&W text; the color that it appeared on the screen depended on the phosphors used in the monitor. The only three choices are white, green, or amber.
The second option, "Hide Mouse," selects whether nor not the Windows mouse arrow should automatically disappear any time it is in the Solace window. It prevents the arrow from obscuring the display. Many people find selecting this option unsettling. You decide.
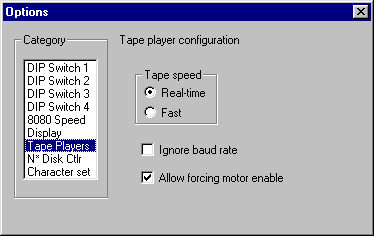
This panel controls how the emulated tape players and their interface should be handled.
The "Tape speed" option selects between real-time and fast. "Real-time" means that while scanning a tape, rewinding, reading or writing files, the emulator takes just as much time as a real Sol would. It can be quite tedious. "Fast" means that Sol proceeds as fast as it can. There are certain cases where the Fast mode is automatically suspended temporarily. When SOLOS first starts up the tape drive mechanism, SOLOS blindly lets the tape advance for a second or so before it even attempts to read or write. In this case, Solace makes the tape advance in real time otherwise miles of tape would fly past before SOLOS started accessing data.
The Sol supported two recording rates: 300 baud, and 1200 baud. Solace emulates both modes. Selecting "Ignore baud rate" will result in Solace obeying the baud rate on writes, but ignoring it on reads.
"Allow forcing motor enable" is explained more fully in the help page on virtual tape operation.
Solace has an interface to a set of property pages to control various options of the Solace emulation. It is accessible via the Solace main menu "Options" menu item, or by clicking on the options button on the toolbar. In this section we are concerned only with the page describing options for Northstar (N*) disk emulation. No matter which Category is selected in the Options control panel, move the choice to "N* Disk Ctlr" and the following dialog will appear:

If the "Northstar Disk Controller Present" isn't selected, all the other items on the dialog will be grayed out, and the toolbar on the main Solace window will not show any disk drive icons. By selecting this item, it installs a virtual disk controller into the Solace computer.
The address where the Northstar disk controller resides is chosen by the "Base Address" combo box. The standard location is 0xE800 and it is also the default location. Unless you really know what you are doing, it is advised that this value not be changed. The virtual disk images that are created by the Disk Factory and that are available from the Sol Archives web site all have boot tracks that have code that assumes that the disk controller exists at 0xE800.
There are four radio buttons groups under the heading "Number of disk drives." This selects how many disk drives are hanging off the disk controller. By choosing a different number, more or fewer disk drive icons will appear on the main Solace window's toolbar. A word of caution, though: if the number of disks is revised downward and one of the disks drives that is going away contains a virtual disk, that disk will be ejected; make sure you don't do this at a critical time where data that needs to be written to the disk hasn't been written yet.
The final item on this control panel is the "Enable Driver Checking" checkbox. By default it isn't selected. If you want to write or debug a disk driver, select this checkbox. If it is checked, it will cause Solace to check for various violations of the disk controller's software interface. For example, if the disk head is stepped too quickly, or the head is stepped out too far, or if the disk step direction and the step pulse are given at the same time. In any of these, and other, cases, if the "Enable Driver Checking" is selected, a warning box appears like the one below:
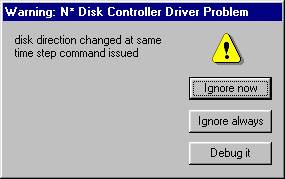
The exact text that is displayed depends on what error was detected. The user then has three choices:
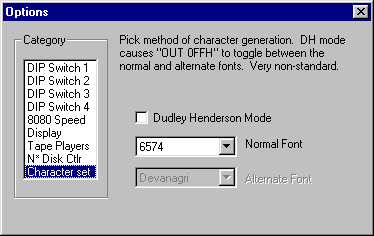
The stock Sol could be stuffed with one of two character generators: the 6574, or the 6575. These two generators were identical for codes 32-127 (decimal). For codes 0-31, the 6574 displayed funny little symbols, while the 6575 displayed miniature two-letter text describing the character (eg, "LF" for line-feed).
One Sol/Solace enthusiast modified his Sol with a custom-made character generator to allow editing text in the local dialects in Nepal. An "OUT 0FFh" instruction toggled between the normal character generator and the custom one. I don't foresee widespread use of this feature.
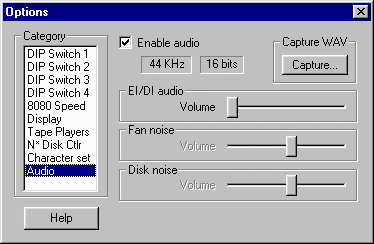
This control panel is used to control both the emulation of the Processor Tech. Music System audio card as well as sound effects.
The check box in the upper left is the master audio enable/disable control. If you have no need for audio, just disable this and it will slightly lower the host CPU burden caused by Solace.
Just below the "Enable audio" checkbox are a couple of static (i.e., can't be edited) boxes showing what the audio sample rate and depth that Solace chose to use. Solace will attempt to use 44.1KHz sampling if possible, and if not, then 22050 Hz, otherwise it won't generate audio. Solace also prefers to use 16b samples, but if the audio system doesn't support it, it will settle for 8b samples.
Clicking the upper right button labelled "Capture..." will bring up a file dialog box. Audio samples will be saved to a WAV file; in the mean time, the button label is changed to "Stop" to let you know you are capturing audio.
The box labelled "EI/DI audio" controls emulation of the P.T. Music System interrupt enable-based audio generation. If you aren't running the Music System software (or something comparable), turn the volume down on this otherwise any program that might perform EI or DI instructions may result in spurious clicking sounds.
The next two boxes, "Fan noise" and "Disk noise" control sound effects. The associated slider bars allow setting volume for each category. The "Disk noise" is formed from a few different noise sources, including the sound of opening and closing a drive door, the motor noise and disk friction, and the sound of the head stepping.
Back to Solace main page.
Last update: May 1, 2002